
Pool Water Testing For Dummies is a short guide that explains the dos and don’ts for testing your chemical levels in your pool.
Believe it or not, the way you perform a water test can affect the accuracy and reliability of your results. To ensure accurate results each time you test your water, we consulted with Taylor Technologies and created Pool Water Testing For Dummies.
1. Read The Instructions
As a tech writer, I am well aware that most people do not read the instructions until they have to. By then, though, it may be too late. Don’t be one of those people! Instead, read the instructions first. If you have a Taylor Test Kit, the instructions are easy to read and follow.
Additionally, if you haven’t performed a water test in some time or you recently switched testing manufacturers, we recommend reading through the instructions as a refresher. In many cases, instructions and measurements will vary between manufacturers and tests.
2. Always Use A Plastic Container
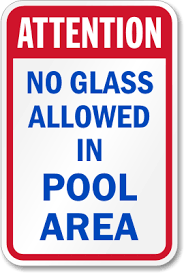
When taking a water sample, we recommend using a plastic container. The one time you decide to use glass is the one time it breaks and falls into the pool. Trust us. To stay on the safe side, simply use a plastic container.
The best container to use for collecting your water sample is a plastic, opaque container with a lid.
3. Take A Representative Sample
Ideally, when you are pulling a water sample, you want to get a sample from the shallow end, a sample from the deep end, and then average the two.
But, who has that kind of time, right?
Realistically speaking, try to meet somewhere in the middle. A good spot to pull your water from is right where your pool floor starts to slope into the deep end. Make sure you don’t go too far into the deep end, though. You also want to ensure it is at least 18 inches below the surface. The sun can penetrate through 4-6 inches of water, compromising your chemical levels. Be sure to keep that in mind.
Lastly, make sure you stay away from any return lines.
4. Do Not Mix The Sample With Your Fingers
Although it may be a habit, try not to use your fingers to mix your water sample. Additionally, try to remember not to put your palms over the sample and shake it. It’s a habit, I know. Even if you just washed your hands, your hands will contain natural oils that can affect the accuracy of your results.
In short, read and follow the instructions listed in the manual as each test may require something different.
5. Pay Attention To The Temperature And Time
If you are performing your test at home, the recommended sample temperature is between 50 degrees F and 90 degrees F. Water samples hotter than 90 degrees F, typically from spas, tend to deliver mixed and unreliable results because the water essentially ‘cooks’ the reagents. You may get colors that don’t really match anything or color results that simply do not make sense.
If the water from your spa is too hot to test, take your sample in the house and let it cool down for a few minutes. It shouldn’t take too long for the temperature to fall between the recommended testing range.
On the other hand, if your water sample drops below 50 degrees F, it slows down the chemical process. When this happens, this will also slow down the actual results of the test and often give you faulty results.
If you are taking your water sample to the store, get it there within 30-45 minutes. I would not trust the test results from a water sample taken longer than 45 minutes ago. Also, try not to keep your water sample in the car as you run errands. Remember, the heat can affect the water sample so your results won’t be representative of your pool.
6. Rinse Your Caps And Cells
The main reason you want to rinse your caps and cells carefully is that you don’t want any remnants of the previous test to affect your current test. In most cases, the leftover material is blind to the naked eye. Although you think it is clean, it probably isn’t.
In an ideal world, you want to rinse your caps and cells with distilled water. However, if you decide to use your pool water, rinse it a few times.
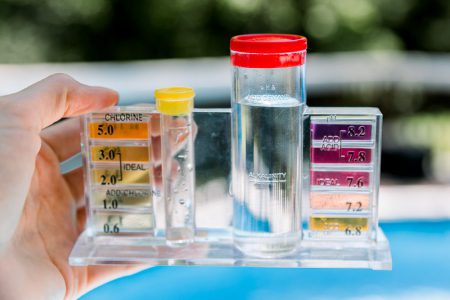
7. Use The Correct Amount
Sample Size
Oddly enough, there is a correlation between pool owners who don’t read the instructions and those who use incorrect sample sizes. If the instructions state to fill up the test cell to 25 mils, do not use less or more. If you use a different amount, you will get the wrong answer. Drop equivalences, color intensity, and sample size all correlate to one another. Moving one will affect the results for the other two.
Reagents
Use the correct amount of reagents listed in the instructions for each particular test. Again, tests may vary from test to test and from manufacturer to manufacturer. Using more reagents than specified is neither a good thing nor will it give you ‘better’ or faster results.
8. Do Not Interchange Reagents
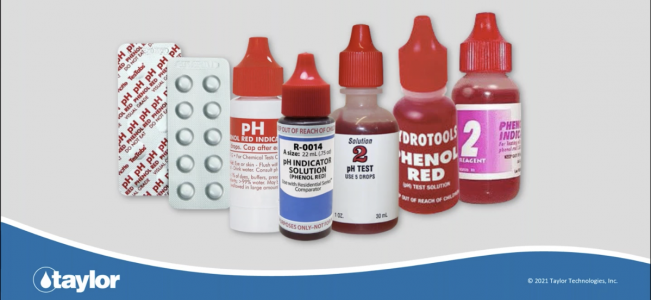
Do not interchange reagents between manufacturer’s test kits, even if your local pool guy says you can. Even though the names of the reagents may be identical, it does not mean the amount and the potency of the reagents are the same.
Again, it’s imperative that you follow the provided instructions carefully. The label on the bottle also indicates which particular test the reagents are used for and what comparator to use
9. Don’t Use Expired Products
Although this should go without saying, do not use any expired reagents. They have expiration dates for a reason.
If you have any other questions about pool and spa products please do let us know - we are here to help!
1 comment
don weber
Does water color have any effect as to how safe your pool is? For example, some pools appear to have a green color after being treated and some pools seem to have a blue color after being treated. Can you tell how safe a pool is by looking at the color of the pool water?